2. 安装设置
你不必安装本文所列的所有程序,实际上你只需要一个文本编辑器就能参与编写sphinx文档,通过git或svn等版本管理工具, 整个团队可以进行有效协作,而将文本编译为html或pdf,可以交给服务器去做。
如果你要重度参与编写sphinx文档,那么安装本文所列工具后,你将获得非常强大的文档编辑的能力,包括布局、画图、建立 索引、自动化格式(尤其是各种代码格式)、内容参数化以及一些自动化功能。
2.1. 安装Python虚拟机
为什么要用虚拟机? 这里参考一个博客的说法如下
在实际项目开发中,我们通常会根据自己的需求去下载各种相应的框架库, 如Scrapy、Beautiful Soup等,但是可能每个项目使用的框架库并不一样, 或使用框架的版本不一样,这样需要我们根据需求不断的更新或卸载相应的库。 直接怼我们的Python环境操作会让我们的开发环境和项目造成很多不必要的麻烦, 管理也相当混乱。
场景1:项目A需要某个框架1.0版本,项目B需要这个库的2.0版本。 如果没有安装虚拟环境,那么当你使用这两个项目时,你就需要来回的卸载 安装了,这样很容易就给你的项目带来莫名的错误。
场景2:公司之前的项目需要python2.7环境下运行,而你接手的项目需要在 python3环境中运行,想想就应该知道,如果不使用虚拟环境,这这两个项目 可能无法同时使用,使用python3则公司之前的项目可能无法运行,反之则 新项目运行有麻烦。而如果虚拟环境可以分别为这两个项目配置不同的运行环境, 这样两个项目就可以同时运行。
下面是安装Python虚拟机的简单方法:
#安装python虚拟环境应用
$ pip install virtualenv
#或者用 pip3 install virtualenv

#新建python虚拟机目录,并创建虚拟机,我这里用sphinx-doc作为虚拟机名字
MacBook:~ vik.qian$ mkdir pyenv
MacBook:pyenv vik.qian$ cd pyenv
MacBook:pyenv vik.qian$ virtualenv sphinx-doc

#激活虚拟机
MacBook:pyenv vik.qian$ source sphinx-doc/bin/activate
(sphinx-doc) MacBook:pyenv vik.qian$
#前面多了个括号,说明进入了虚拟机

#退出虚拟机
(sphinx-doc) MacBook:pyenv vik.qian$ deactivate
2.2. 安装sphinx
2.2.1. 安装到Linux
当然是通过 官网链接 说明安装,以下English内容引用官网。
注解
使用命令请在相应的python虚拟机运行安装
2.2.1.1. Debian/Ubuntu
Install either python3-sphinx (Python 3) or python-sphinx (Python 2)
using apt-get:
$ apt-get install python3-sphinx
If it not already present, this will install Python for you.
2.2.1.2. RHEL, CentOS
Install python-sphinx using yum:
$ yum install python-sphinx
If it not already present, this will install Python for you.
2.2.1.3. Other distributions
Most Linux distributions have Sphinx in their package repositories. Usually
the package is called python3-sphinx, python-sphinx or sphinx. Be
aware that there are at least two other packages with sphinx in their name:
a speech recognition toolkit (CMU Sphinx) and a full-text search database
(Sphinx search).
2.2.2. 安装到macOS
Sphinx can be installed using Homebrew, MacPorts, or as part of a Python distribution such as Anaconda.
2.2.2.2. MacPorts
Install either python36-sphinx (Python 3) or python27-sphinx (Python 2)
using port:
$ sudo port install py36-sphinx
To set up the executable paths, use the port select command:
$ sudo port select --set python python36
$ sudo port select --set sphinx py36-sphinx
For more information, refer to the package overview.
2.2.2.3. Anaconda
$ conda install sphinx
2.2.3. 安装到Windows
Most Windows users do not have Python installed by default, so we begin with the installation of Python itself. To check if you already have Python installed, open the Command Prompt (⊞Win-r and type cmd). Once the command prompt is open, type python --version and press Enter. If Python is installed, you will see the version of Python printed to the screen. If you do not have Python installed, refer to the Hitchhikers Guide to Python’s Python on Windows installation guides. You must install Python 3.
Once Python is installed, you can install Sphinx using pip. Refer to the pip installation instructions below for more information.
2.2.3.1. Installation from PyPI
Sphinx packages are published on the Python Package Index. The preferred tool for installing packages from PyPI is pip. This tool is provided with all modern versions of Python.
On Linux or MacOS, you should open your terminal and run the following command.
$ pip install -U sphinx
On Windows, you should open Command Prompt (⊞Win-r and type cmd) and run the same command.
C:\> pip install -U sphinx
After installation, type sphinx-build --version on the command prompt. If everything worked fine, you will see the version number for the Sphinx package you just installed.
Installation from PyPI also allows you to install the latest development
release. You will not generally need (or want) to do this, but it can be
useful if you see a possible bug in the latest stable release. To do this, use
the --pre flag.
$ pip install -U --pre sphinx
2.3. 安装VSCode
Visual Studio Code 可能是我使用过的最酷的文档编辑器,超级好用,且有很多插件,强烈推荐使用VSCode写sphinx文档。 正如,我现在在使用的,VSCode也支持reStructuredText语言,且支持实时预览 – 如果你习惯于写Markdown时实时预览的话, 你会喜欢的。VSCode安装地址 https://code.visualstudio.com/ 。
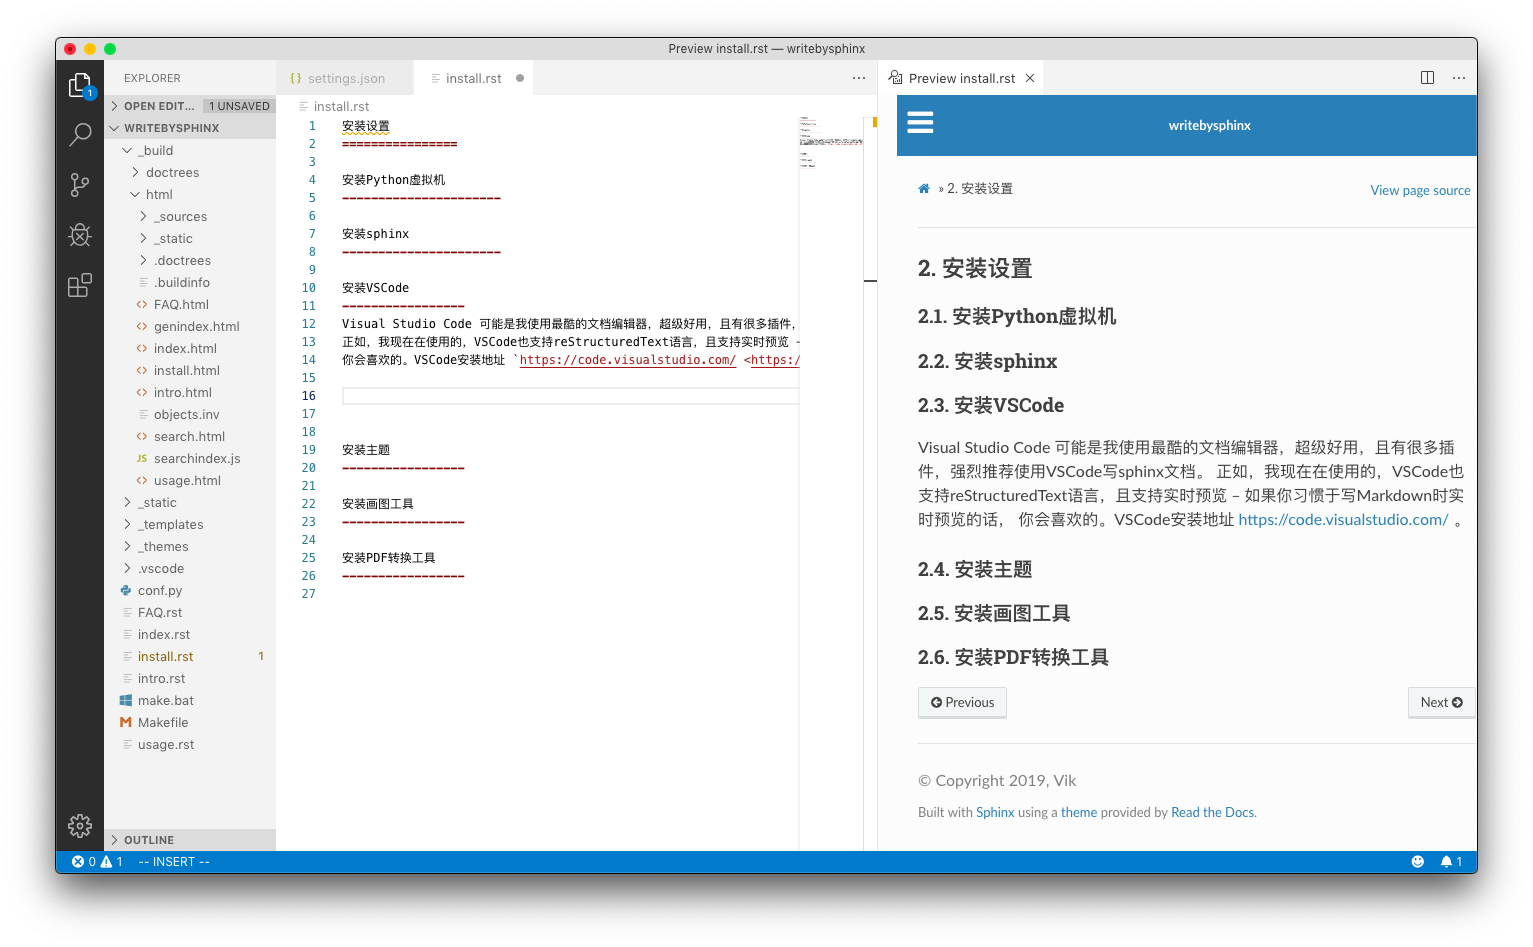
用 Visual Studio Code编辑reStructuredText,并渲染为html
注解
如果系统有多个版本python,配置不对可能导致VSCode渲染html失败,可以在VSCode setting中设置python的path,从而使用正确的版本:
"python.pythonPath": "/Users/vik.qian/pythonvenvs/sphinx-doc/bin/python3 ,如下图:
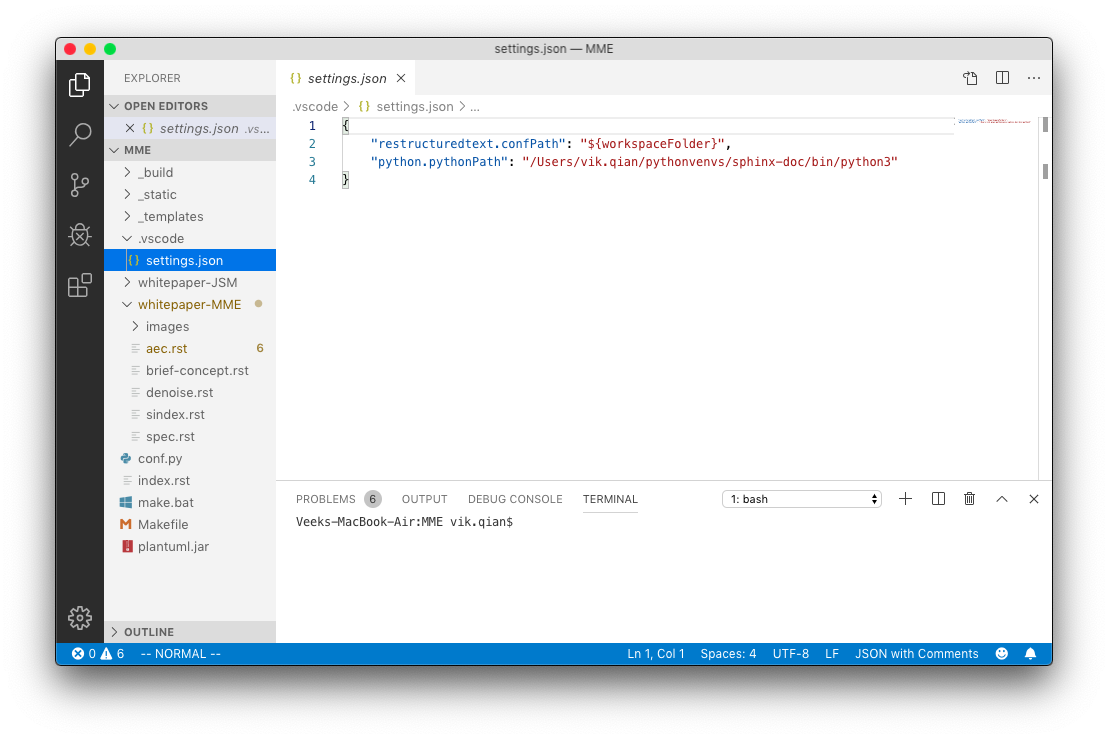
setting.json中设置python版本
提示
注意:VSCode可以安装许多插件,一些插件会影响编辑习惯,比如如果安装了默认VIM风格的输入方式, 那么你必须按照VIM方式进行输入,如果不习惯则可以考虑禁用这些插件。
2.4. 安装主题
sphinx默认主题alabaster太素,可以选一个最经典的主题 sphinx_rtd_theme , 直接用这个命令装:
pip install sphinx_rtd_theme
注解
命令请在相应的python虚拟机运行安装
2.4.1. 在conf.py配置
import sphinx_rtd_theme
html_theme = 'sphinx_rtd_theme
2.4.2. 解决表格过宽问题
主题 sphinx_rtd_theme 的表格有个内容无法换行的bug,导致许多表格过宽, 参考这个 网站 的方法,重载css并在conf.py配置后,就可以解决。
The Read the Docs Sphinx theme contains a bug that causes text in table cells not to wrap. This results in very wide tables with horizontal scroll bars.
You can workaround this issue by defining a custom CCS override file.
Change into your documentation directory. This is usually where the
index.rstandconf.pyfiles are located:$ cd doc
If it does not already exist, create a
_staticdirectory:$ mkdir _static
Create a
theme_overrides.cssfile in the_staticdirectory:$ touch _static/theme_overrides.css
Open the
theme_overrides.cssfile and add the following CSS:/* override table width restrictions */ @media screen and (min-width: 767px) { .wy-table-responsive table td { /* !important prevents the common CSS stylesheets from overriding this as on RTD they are loaded after this stylesheet */ white-space: normal !important; } .wy-table-responsive { overflow: visible !important; } }Open the
conf.pyfile and add the following configuration options:html_static_path = ['_static'] html_context = { 'css_files': [ '_static/theme_overrides.css', # override wide tables in RTD theme ], }
Build your documentation using Sphinx and check the tables; cells should now wrap correctly.
2.5. 安装画图工具
文档中的图最好都能够用脚本描述,工具自动画,这样有利于版本维护,推荐使用plantuml和Graphviz, 前者用来画UML图,后者可以画状态转移图。
2.5.1. 安装sphinxcontrib-plantuml
plantuml.jar是个java程序,运行起来有点慢,但功能强大,也还能接受。
注解
使用命令请在相应的python虚拟机运行安装
2.5.1.1. pip安装
pip install sphinxcontrib-plantuml
2.5.2. 修改Sphinx文档配置
找到文档目录中的conf.py文件,添加extension和plantuml调用指令。
import os

# Add any Sphinx extension module names here, as strings. They can be
# extensions coming with Sphinx (named 'sphinx.ext.*') or your custom
# ones.
extensions = ['sphinxcontrib.plantuml',
              'sphinx.ext.graphviz']

# 设置 plantuml.jar 路径
currentpath = os.getcwd() + '/'
plantuml = 'java -jar ' + currentpath + 'plantuml.jar'
2.5.3. 下载 plantuml.jar 文件
下载 plantuml.jar 文件,plantuml放在当前工程目录(因为conf.py中,假设是放在当前工作目录
currentpath = os.getcwd() + '/' )。
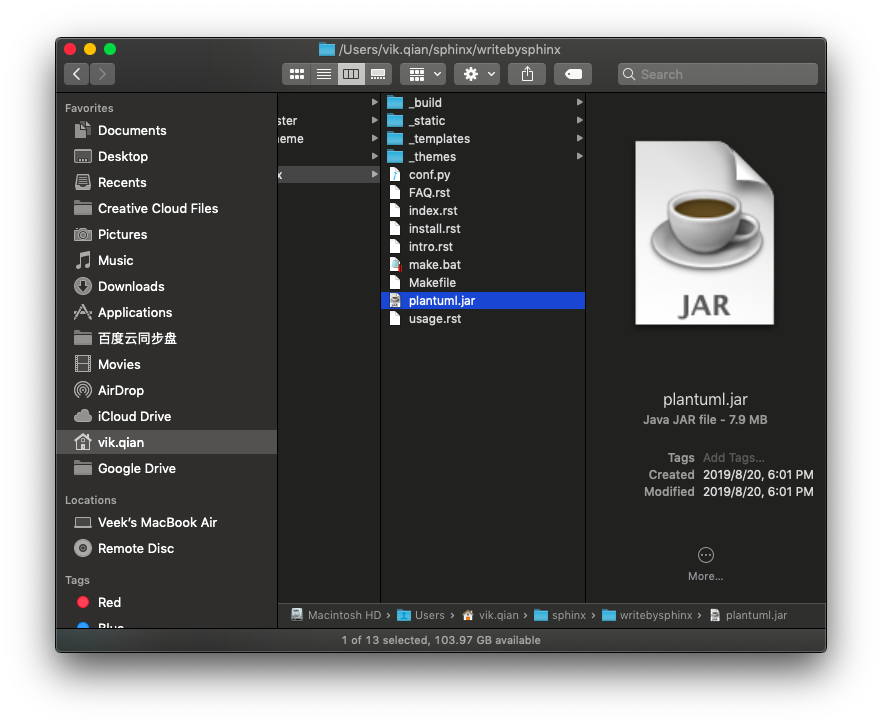
注意 plantuml放对目录以便 java命令能找到它
2.5.4. 安装 graphviz
Graphviz是一个很轻量的软件,性能非常好,用起来飞一样。
注解
使用命令请在相应的python虚拟机运行安装
Graphviz的安装说明网站 ,最简单的安装命令如下
$ pip install graphviz
需要在conf.py中进行如下配置:
extensions = ['sphinxcontrib.plantuml',
            'sphinx.ext.graphviz']

# 设置 graphviz_dot 布局风格
# dot 默认布局方式,主要用于有向图
# neato 基于spring-model(又称force-based)算法   基于斥力+张力的布局
# twopi 径向布局
# circo 圆环布局
# osage
# fdp 用于无向图
# sfdp 用于无向图
graphviz_dot = 'dot'

# 设置 graphviz_dot_args 的参数,这里默认了默认字体
graphviz_dot_args = ['-Gfontname=Georgia',
                    '-Nfontname=Georgia',
                    '-Efontname=Georgia']
# 输出格式,默认png,这里我用svg矢量图
graphviz_output_format = 'svg
2.6. 安装PDF转换工具
有时候文档需要发布到pdf,这篇博客写了如何转pdf ,我还没试过, 主要是 MacTeX/TeXLive 太大,适合装在服务器端。
另外,如果你使用readthedocs来发布文档,那么readthedocs也会同时自动生成pdf,还是比较方便的。
2.7. 安装Breathe
如果你计划使用doxygen从代码生成文档,并导入sphinx,那么使用工具Breathe,作为一个“桥梁”可以实现这个目标。 如果你没有这个需求,那么安装Breathe不是必须的,Breathe安装命令:
$ pip install breathe
安装完成后,在conf.py中进行如下配置,其中yourcodefile是由doxygen生成的一系列xml/xsd/xslt文件:
extensions = ['sphinxcontrib.plantuml',
            'sphinx.ext.graphviz',
            'breathe']

# 设置 doxyxml 路径
breathe_projects = {
            "yourcodefile": '../doxyxml/yourcodefile'
}